Instances
In this article:
Instances#
NGN Cloud provides computing resources as instances. Instances section is used to create virtual machines, change their parameters and advance settings, and display a list and details of all instances created under the project and VPC.
Each instance has several parameters:
ID — the unique instance identifier in NGN Cloud
Status — the current status of the instance. An instance can have the following statuses:
Pending
Running
Stopped
Booting
Suspending
Suspended
Snapshot
Name tag is a tag with the Name key and a value set by a user. To learn more about tags, please see Tags section.
Type – the instance type
Availability Zone — the information on the data center in which physical hardware is located
Subnet — the subnet in which the instance is located
Created — the instance creation date
SSH-key — the specific SSH-key assigned to an instance
Elastic IP — the external IP address of the primary network interface of an instance
Private IP — the private IP address of the primary network interface of an instance
Placement group — the placement group that the instance belongs to
Click the icon on the right to search bar to go to instance parameter display settings.
Creating an instance#
You can launch an instance using one of the three methods:
Create an instance using the wizard#
To open the instance wizard, go to the Instances section and click Create.
Step 1. Select an image#
When starting an instance, you need to select a pre-created image with the OS you want to use, for example, Windows, Debian, Ubuntu, etc.
In a drop-down list of the creation wizard, the following pre-created images are available for selection:
All images — all available images
NGN images – images that NGN Cloud offers
Own images — images created by a user in the Images section
Shared images — user project images to which access is granted
To quickly find an image, you can use the image filter and/or search by ID or description. Select a pre-built image and click Select.
Note
If the desired image is not among the available images, click Create new image. You will be automatically switched to Images section. Create here the desired image according to the instruction. You will have to start the instance creation procedure all over again, so it is better to create the image in advance.
Step 2. Select an instance placement#
At this step, you need to select where in the cloud the instance will be placed.
Placement group — When you select a placement group, its member instances will be launched on different computing nodes. This helps minimize the number of failed instances if one of the physical nodes fails. To use the placement group, create it first. For more information, see the documentation on placement groups.
Placement type — If the default value (
Shared server) is selected, instances will be started on a shared computing node where instances of other users can be deployed. To launch an instance on a dedicated host, order it first. More information about starting an instance on a dedicated host can be read in the respective section of the documentation.
Step 3. Select an instance type.#
NGN Cloud offers users a wide variety of instance types with different combinations of computing resources and memory sizes.
All instance types are grouped and ordered by family. You can select types from the following families: General purpose, Memory optimized, Compute optimized, and High performance computing optimized.
The table provides recommendations on instance types for various tasks.
Compute optimized |
General purpose |
Memory optimized |
HPC optimized |
|---|---|---|---|
These instances are optimized for compute-intensive workloads. They are optimal for tasks that require many computing cores, but do not require a large amount of memory. |
These instances are suitable for wide range of tasks. They offer a balance of computing power and memory size. |
These instances are optimal for memory-intensive workloads. They offer more memory per core than instances of other types. |
These instances deliver ultra-high performance for compute-intensive workloads. These instances are based on 2nd Generation Intel® Xeon® Scalable Processors. |
|
|
Memory-intensive tasks |
|
NGN Cloud instances are powered by Intel® CPUs. Hardware characteristics for each generation are shown in the table.
gen2 |
gen3 |
gen4 |
gen5 |
gen5p |
gen6* |
|
|---|---|---|---|---|---|---|
CPU |
Intel® Xeon® Processor E5-2670 |
Intel® Xeon® Gold 6140 Processor |
Intel® Xeon® Platinum 8168 Processor |
Intel® Xeon® Gold 6254 Processor |
Intel® Xeon® Gold 6244 Processor |
Intel® Xeon® Gold 6348 Processor |
Characteristics |
Max Turbo Frequency 3.30 GHz |
Max Turbo Frequency 3.70 GHz |
Max Turbo Frequency 3.70 GHz |
Max Turbo Frequency 4.00 GHz |
Max Turbo Frequency 4.40 GHz |
Max Turbo Frequency 3.50 GHz |
* The gen6 CPUs are installed only :ref:`on dedicated hosts <DedicatedHostsManual>`.
All our servers in the data center have the Power Boost option enabled. This allows instances to get the most out of the CPU and run at the maximum CPU frequency. Hypervisor does not allow passing this information to an instance. Therefore, if you try to check CPU frequency using OS tools from within the instance, you will see the base CPU frequency.
To quickly find the required instance type, you can search by instance type or apply filters by family, CPU generation, vCPU count, and RAM size. Select an instance type from the list of predefined types according to your needs and click Select.
Note
If you are not sure which VM type is best for your workload, start with General purpose instances. In NGN Cloud, you can change instance type if necessary. For optimal performance, we recommend using the instance types of the current generation gen5 .
Note
For Windows, we recommend choosing instance types with at least 4,096 MB RAM.
Step 4. Select instance parameters.#
In this step, set the parameters required to create an instance.
Parameter |
Description |
|---|---|
Name tag |
A tag with the Name key and a value set by a user. |
Number of instances |
Number of instances of this type to create (1 by default) |
Virtualization type |
|
SSH-key |
If public SSH keys are added to the project, you can select one of them. |
VPC |
VPC where the instance will run. To create the instance in a new VPC, click Create a new VPC and subnet and set the required VPC and subnet parameters. |
Subnet |
Subnet where the instance will run. To create the instance in a new subnet, click Create a new subnet and set the required parameters. |
User data |
User data describes operations that are automatically executed when the instance is created. |
Delete on instance shutdown |
Specifies whether the instance should automatically be terminated after the shutdown |
Then, you can directly proceed to view the selected instance configuration. To do this, click Overview and launch. Attachable devices, such as network interface and volumes, will use default parameters. To specify other parameters, add more devices, or set tags, click Next to go to the desired step.
Step 5. Select network devices#
In this step, set the parameters of the network interfaces that will be attached to the instance.
A network interface allows you to connect an instance to a subnet or switch. By default, a new instance will have a network interface with 0 index. This primary network interface cannot be detached from the instance.
Optionally, you can specify the following parameters:
Parameter |
Description |
|---|---|
Network interface |
Selecting a new or existing available interface. |
Network |
Selecting a subnet or switch to which the network interface will be connected. |
Description |
Description provided by a user. |
Private IP |
The internal address of the primary interface at which the instance will be accessible after creation. If a Private IP is not specified, it will be assigned automatically. |
Security groups |
It is possible to associate up to five security groups from the same VPC with an instance. If you do not specify a security group, the default group will be assigned at the start. |
Delete with instance |
Specifies whether the network interface must be automatically deleted together with the instance. |
Associate with existing Elastic IP |
Associate an available public IP address to get access from the Internet after the instance is started. A public IP address must be allocated in advance in the Elastic IPs section. |
In this step, you can create and attach additional network interfaces to the instance. To create a new interface or select an existing available network interface, click Add device.
You can create or select max. 15 network interfaces in this step. For more information on network interfaces, see Network Interfaces.
Once you have set interface parameters, you can proceed to review the configuration for quick instance creation or follow the other wizard steps. In the former case, click Review and launch; in the latter, click Next.
Step 6. Select volumes#
In this step, set parameters of the volumes that will be created with the instance.
A set of parameters in a dialog helps choose volume configuration:
Parameter |
Description |
|---|---|
Snapshot |
A snapshot from which you are going to create an instance (by default, snapshots that belong to the selected images are shown). |
Size |
Volume size in gibibytes (1 gibibyte = 1,024 mebibytes). |
Volume type |
Sets the desired volume type. For more information on volume features and parameters see page Volumes. |
IOPS |
The maximum total number of I/O operations per second. For st2 and gp2 volumes the number of IOPS is calculated automatically, for io2 volumes you can specify the required number of IOPS. |
Throughput |
The maximum total rate, in MiB/s, at which data can be read from or written to a volume. It is calculated automatically for st2, gp2, and io2 volumes. |
Delete with instance |
Specifies whether the volume must be automatically deleted after the instance is deleted. |
To add more volumes, click Add volume and specify the required parameters. You can attach up to 16 volumes to instances with the hvm virtualization type, and up to 4 volumes to instances with the hvm-legacy virtualization type.
For instance, the volume marked with the icon will be bootable, while the rest will be additional volumes. Unlike additional volumes, a bootable volume cannot be detached from an instance.
Once you have set the volume parameters, you can skip the next step (tag setting) and proceed directly to reviewing the instance configuration and creating the instance. To do this, click Review and launch. To set tags, click Next.
Step 7. Add tags#
In this step, you can assign custom tags to an instance and volumes that will be created with the instance. Specify key-value pairs, and click Overview and launch.
Step 8. Review parameters#
In the Review step, check your instance parameters and click Launch.
Instance start takes some time. Upon completion of the instance launch process, its status will change from Pending to Running. Each created instance is assigned a unique ID in the i-xxxxxx format.
Some instance parameters can be changed anytime. Click a link with unique ID to make changes, attach or detach additional volumes, reboot or shut down an instance, change public address, etc.
Create an instance from a launch template#
If you need to launch instances with the same parameters from time to time, use launch template to quickly launch an instance from a saved configuration. You can also create instances with differing parameters, using template versions.
Go to the Instances section and select Create an instance from launch template from the drop-down menu to the right of the Create button.
In the dialog window, select a launch template and its version.
If the option Security groups was selected when creating the launch template, then you should specify the subnet to which the primary network interface will be attached. If the Advanced network configuration option was selected when creating the launch template, you do not need specifyi the subnet. You will also see in the dialog window the ID and name of the VPC where the corresponding network resources are located.
Specify the number of instances to be launched.
If necessary, change the instance type and the Name tag, as well as the resources which the Name tag is assigned to.
Once the parameters are set, click Overview and Launch and check the instance configuration.
To create an instance, click Launch.
You can also create an instance from a template in the Launch Templates section.
Create an instance from another instance#
You can create a required number of instances with the same parameters as an existing instance has.
Go to the Instances section and in the instance table, select an instance with the required parameters to be used as a reference configuration.
To the right of the Create button, select Create an additional instance in the drop-down menu.
In the dialog window, specify the number of instances to be created.
You can also change the Name tag, enable the Terminate on instance shutdown option to delete the instance after it is stopped, and add user data.
Once the parameters are set, click Overview and Launch and check the instance configuration.
Click Launch.
Deleting an instance#
Before deleting an instance, make sure you do not lose any important data. If you need to save a volume copy for future use in NGN Cloud, you can create a snapshot of a volume. If you need a volume or instance copy to boot from and run in your local infrastructure, use the export function.
Go to the Instances section, select a no-longer-needed instance, click bdg-light:Delete, and confirm the action in the dialog window. Volumes and network interfaces for which the Delete with instance flag is set, as well as all instance tags, will be deleted along with the instance.
Connecting to an instance#
Getting the console output#
Click View output on the Information tab of the instance page to get current state of instance launch process or to get password.
Accessing the remote console#
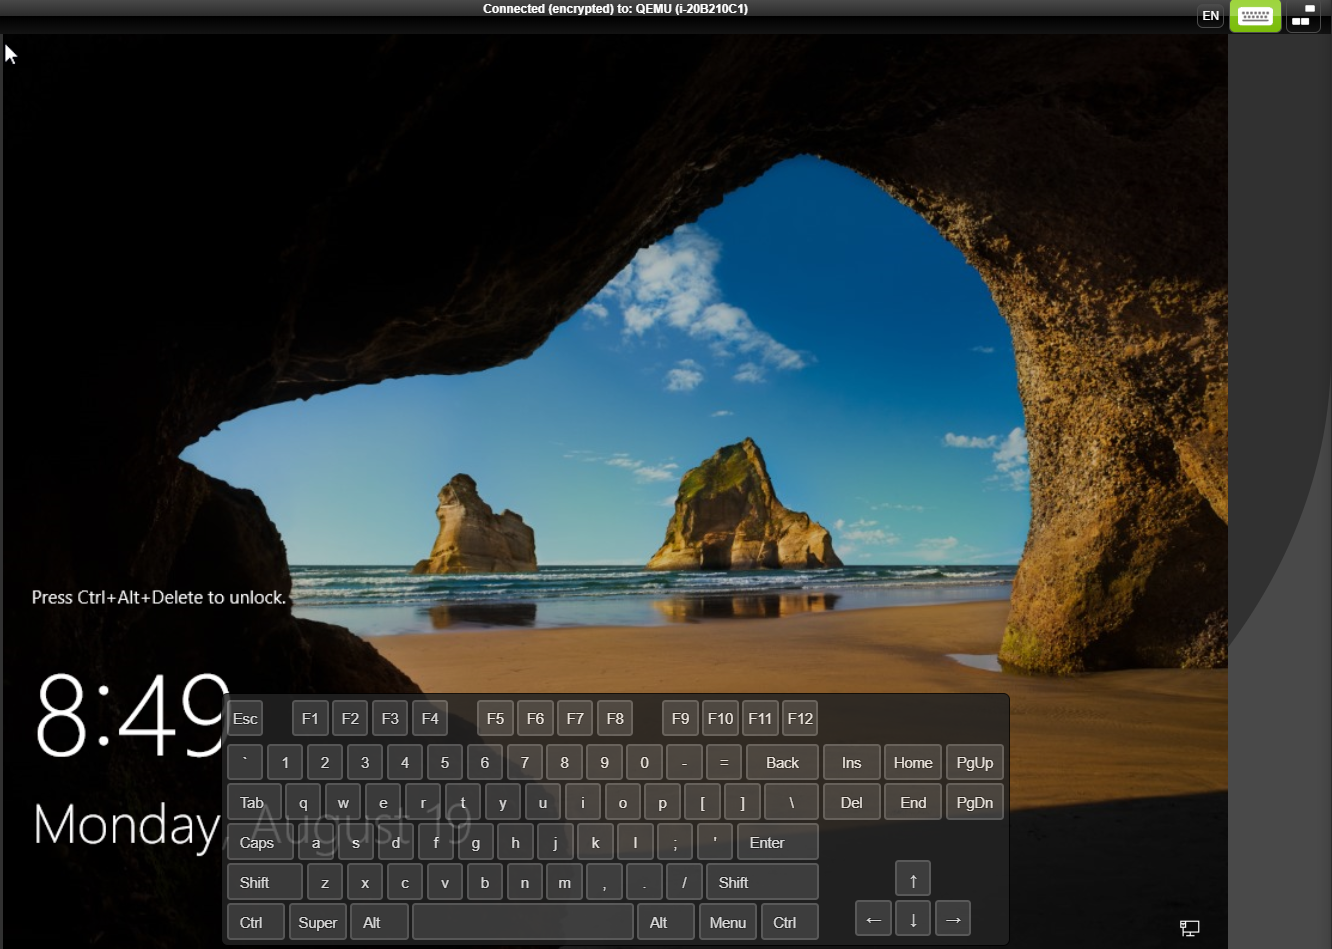
In NGN Cloud, you can connect to an instance using a remote console no matter what the state the network is in and whether a public IP address is associated with the instance. To open the console to manage instance remotely, go to the instance page and click Open Console. The following additional buttons are located in the top right corner of the management console for user convenience:
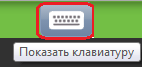 — click this button to open virtual keyboard.
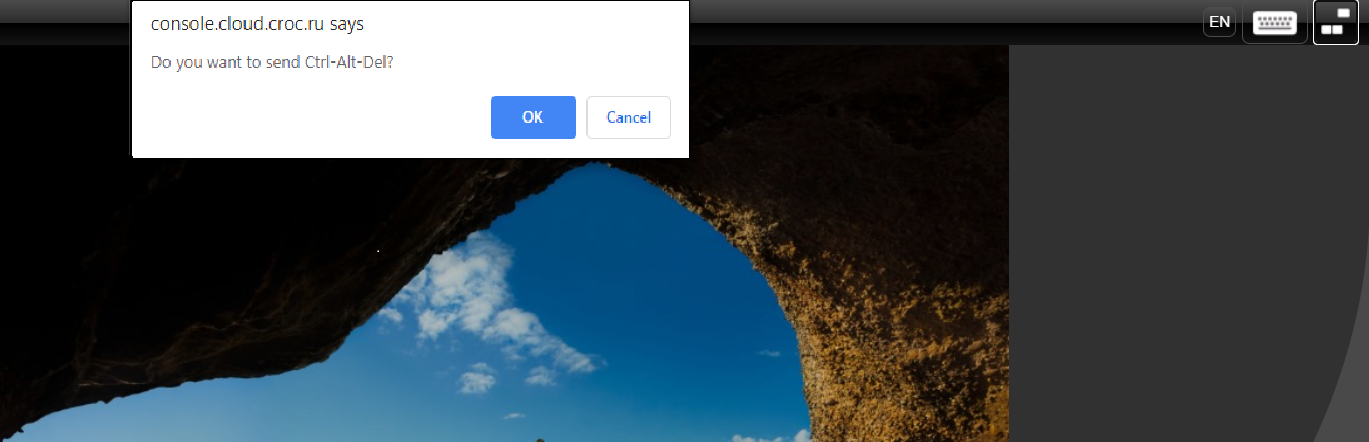
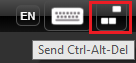 — clicking this button has the same effect as pressing Ctrl + Alt + Delete on a keyboard.
Enabling access to the remote console#
You can grant any NGN Cloud user with a remote access to the instance.
To grant access to the remote console, go to the instance page, navigate to the Information tab, and click Share. Enter the user’s email and access duration, and confirm the action. A link to access the remote console will be sent to the specified email.
Important
Access to the remote console can only be granted to the users that have user account in NGN Cloud.
Other methods#
You can read about other ways to connect to an instance in Instructions section of documentation.
Actions on instances#
Rebooting an instance#
Rebooting an instance is equivalent to rebooting an OS. In most cases, rebooting an instance takes only a few minutes. To reboot the instance, while gracefully stopping all services, go to the Instances section. Then select the instance from the list, click Reboot and confirm the action.
Activating hibernation#
Important
We do not guarantee that an instance without a proper preconfiguration will enter the hibernation mode after clicking the Hibernate button.
Hibernation is a state in which the memory content of an instance, applications, and processes is saved to the local volume of the instance before it enters the stopped state. It differs from stopping an instance as follows:
To hibernate an instance, its operating system must be correctly configured;
In the hibernation mode, instances save memory and application states that they had when hibernation was initiated;
Hibernation can be used for instance pre-warming if the instance or application takes a long time to boot.
When you hibernate a correctly configured instance, NGN Cloud signals the OS to perform hibernation. To start hibernation, the guest OS uses an installed qemu-guest-agent. The cloud communicates with the agent and sends it the appropriate command, where thereafter qemu-guest-agent prompts the OS to enter the hibernation mode. In this mode, the OS saves the memory content of the instance to a volume.
Important
Please note that the volume size must be larger than the RAM size of the instance.
Attention
We do not recommend resizing the volume or changing the type of hibernated instance. Otherwise, the OS will boot normally, and the saved VM memory state will be ignored.
When you start this instance again, it will enter the Pending state, the memory content will be downloaded from the volume, and the states of processes and applications will be restored.
How fast an instant enters/exits the hibernation mode depends on the volume performance. To accelerate the process, you can use higher-performance volume types, such as gp2: Universal (SSD) and io2: Maximum (SSD).
Using hibernation mode reduces your cloud cost during instance suspension periods since the payment is only charged for storing its volumes and Elastic IP.
To switch an instance to the hibernation mode, go to the Instances section. Then select the instance from the list, click Hibernate and confirm the action.
Stopping an instance#
To gracefully shut down an instance, go to the Instances section. Then select the instance from the list, click Stop and confirm the action.
If the operating system of the instance does not shutdown within a few minutes, do a forced shutdown (it is similar to turning off the server’s power). To do this, click Stop (force) and confirm the action.
Some instance parameters can only be changed when it is stopped.
Creating an image#
An image can be created from both a stopped and running instance. To create an instance image, from which you can further create new instances with the same parameters, go to the Instances section, select the instance from the list, and click Create image. In the dialog window, specify the image name, modify the suggested image description if necessary, and click Create.
An Image is created in two steps. First, snapshots of all attached volumes are taken simultaneously. This takes a fraction of a second and does not block the running instance.
In the second step, snapshots are written in parallel to object storage. The duration of this stage depends on the maximum amount of data on the volumes and may take a long time. All this time, the image will be in the pending status.
The instance can be restarted, stopped or even deleted without waiting for the second image creation stage to complete. But you can create another image from the instance only after the image creation process is complete and the image status changes to Available. The current image status can, for example, be viewed on its page.
In the Images section, you can find the image you have made.
Exporting an instance#
Important
This function is available only for instance with Stopped status.
Important
You need to create a bucket in the Object storage section before exporting an instance.
To export an instance in the bucket, switch to the Instances section, select the instance from the list and click Export. Set necessary parameters in the dialog window. Instance export will take some time and after that, the instance image will appear in Object storage. See details on the Import/Export page of documentation.
Attach an instance to the Auto Scaling Group#
You can attach one or more instances to an existing Auto Scaling Group.
Changing instance parameters#
After the instance starts successfully, you can make changes to it. Below are some parameters you can change to suit your needs.
Note
Right-clicking on the selected instance in the table opens the context menu for instance management.
Changing the instance type#
Important
This function is available only for instance with Stopped status.
You can change the instance type if it does not suite your workload, it. To do this, go to the instance page, navigate to the Information tab, and edit the Instance type field.
All instance types are grouped and ordered by family. You can choose the desired combination of computing power and memory size and optimize your instance for specific tasks or business needs.
Associate/disassociate an Elastic IP address with/from an instance#
To assign a public address to an instance from the list of allocated IP addresses, select the instance in the Instances section and click Associate Elastic IP. Or go to the instance page, open the Information tab and click Associate Elastic IP. The address will be assigned to the primary interface of the instance.
To release an associated public IP address from an instance primary interface and make the address available, select the instance in the Instances section and click Disassociate Elastic IP. Or go to the instance page, open the Information tab and click Disassociate Elastic IP.
To assign a different Elastic IP to an instance, first release the assigned IP address from the primary interface.
Attention
If the primary interface is created in a subnet, you can only associate/disassociate an Elastic IP to/from an instance.
How to associate/disassociate an Elastic IP with/from an arbitrary instance interface, is described below.
Changing the SSH key#
Important
This operation adds a new key each time a key is changed but old key is not removed. Reboot an instance for changes to take effect.
Modify SSH key field on the Information tab of the instance page to assign a new SSH key to the instance.
Changing the root device#
Important
This function is available only for instance with Stopped status.
To change a boot volume attached to an instance, go to the instance page and edit the Root device name field in the Information tab.
Changing user data#
Modify User data field on the Information tab of the instance page to change the user data of the instance after its creation. For details, see section Instance Metadata API.
Attaching/detaching network interfaces#
Instances connect to subnets/switches via network interfaces. You can manage interfaces in the subsection Network Interfaces or via API.
To attach a network interface to an instance, go to the Instances section, select the required instance, and click Attach network interface. Alternatively, go to the instance page, open the Information or Network and security tab, and click Attach network interface. An interface can be attached to only one instance at a time.
The following restrictions apply to attaching network interfaces:
multiple interfaces may not be attached to the same instance if they belong to the same subnet or switch;
if the primary network interface of an instance is a virtual switch network interface, then a subnet interface may not be attached to the instance;
up to 16 network interfaces (including a primary interface) may be attached to an instance;
attached interfaces should be in the same availability zone and belong to the same VPC as the instance itself.
To ensure proper operation of the attached interfaces, we recommend performing a minimum configuration of the interfaces or using NGN images that support automatic interface configuration. Please see Configure the attached interfaces.
To detach a network interface from an instance, go to the Instances section, select the required instance, and click Detach network interface.
Configure hot attachment/detachment of network interfaces#
Interfaces can be attached to/detached from both stopped and running instances. All NGN official images support hot attachment/detachment of interfaces.
The list of Linux distributions that we have tested to support “hot” attachment/detachment of network interfaces:
CentOS/RHEL/OEL 6/7
Ubuntu ≥ 12.04
Debian ≥ 7
Fedora ≥ 19
If you use CentOS/RHEL/OEL 5.x or Ubuntu 10.x, please download the acpiphp kernel module and add it to the autoload.
This functionality is not guaranteed for instances launched from other images.
If you use other Linux distributions, then make sure the kernel is compiled with HOTPLUG_PCI_ACPI support:
[root@host ~]# grep 'CONFIG_HOTPLUG_PCI_ACPI=' /boot/config-`uname -r`
CONFIG_HOTPLUG_PCI_ACPI=y
If the command output is CONFIG_HOTPLUG_PCI_ACPI=y, it means that “hot” attachment/detachment of network interfaces are supported by this operating system “out of box”.
If the result of the command CONFIG_HOTPLUG_PCI_ACPI = m, then hot attach/detach of network interfaces requires downloading acpiphp or pci_hotplug module, depending on OS.
If the command output is a blank line, then the kernel does not support “hot” attachment/detachment of network interfaces.
Attention
If you detach a network interface from an instance and the instance does not support “hot” attachment/detachment of PCI devices at the OS level, the interface will remain in the Detaching internal state until the instance is stopped.
The cloud will return an error to subsequent attempts of hot attachment/detachment of this network interface.
Change the primary network interface#
If you need to move an instance to another subnet or VPC, or from non-VPC to VPC, change the primary network interface of the instance. To do this, you need to have an unattached network interface in the target subnet or VPC. If there is no such interface, create it first. If necessary, assign the new interface an internal IP address of your choice from the target network.
The network interface to be used instead of the primary one should be:
in the same availability zone as the source one;
created in a subnet;
not attached to any instance.
Note
If you are going to move an instance to another VPC, it should not have any other interfaces in the subnet other than the primary one.
To change a primary network interface:
Stop the instance if it is running.
Go to the Instances section and select the desired instance in the table or go to the instance page and open the Information or Network and Security tab.
Click Change primary network interface. If this button is not shown, open the additional action menu (More).
In the dialog window, select the required interface from the list.
Click Change to confirm the change of the primary interface.
Note
Primary interface replacement does not include the transfer of its assigned Elastic IP. If you want the instance to inherit the old Elastic IP, then first disassociate it from the old primary interface and then manually assign it to the new one.
Associate/disassociate an Elastic IP address to/from the network interface#
To assign a public IP address to an arbitrary interface of the instance, open the instance page and go to the Network and Security tab. Select the desired interface from the list and click Associate Elastic IP. In the dialog window, select the desired IP address from the list and press Associate.
To release an associated public IP address from an arbitrary interface of the instance, open the instance page and go to the Network and Security tab. Select the desired interface from the list, click Disassociate Elastic IP and confirm the action.
To assign a different Elastic IP to a network interface, first release the associated IP address from the interface.
Attention
If the network interface is created in a subnet, you can only associate/disassociate an Elastic IP.
Changing security groups#
To change the list of security groups associated with a network interface, open the page of the instance, to which the interface is attached. Switch to the Network and security tab, select the interface from the list and click Change security groups. Select one or more security groups from the list and confirm the action.
Attention
This operation is allowed only for the network interface created in a subnet.
Note
If source/destination check (source-dest-check) is disabled on the selected interface and at least one of the added security groups is a source in the inbound rules of this or any other group, then you cannot associate such security groups with the network interface.
Change placement group#
Important
This function is available only for instance with Stopped status.
To move an instance to another placement group, go to the Instances section, select the instance from the list, and click Modify placement group. In the dialog window, select a placement group and confirm the action by clicking Change. Alternatively, go to the instance page, open the Information tab, and edit the Placement group field.
Operations with volumes#
The Volumes tab contains a list of all volumes attached to the instance. Each volume has a set of parameters:
ID — the unique volume ID.
State — the information on the volume status
Volumes – the sequential number of the volume in this instance
Size — the maximum amount of data that a volume can hold
Name tag — a tag with the Name key and a value set by the user
Volume type
IOPS — the volume performance (IOPS)
To view volume details in the Volumes subsection, go to the instance page and click the link with its unique ID in the Volumes tab.
Attaching/detaching a volume#
Important
A volume can be attached to an instance if they are in the same availability zone.
Only volumes with available status (which aren’t attached to any instance) can be attached to an instance.
Attention
Up to 16 volumes can be attached to an instance. However, you can attach maximum four volumes to instances of the hvm-legacy virtualization type.
To attach another volume created earlier and not attached to an instance, go to the instance page, open the Volumes tab and click Attach. In the dialog window, select the desired volume from the list and confirm the action by clicking Attach again.
Important
You can detach only not root volumes of the instance.
To detach a volume from an instance and make it available for further attachment, go to the instance page, open the Volumes tab, select the desired volume from the list, and click Detach.
Creating a snapshot#
You can create a snapshot of a volume attached to an instance at any time. To take a volume snapshot and then use it as an image for new volumes or data backups, go to the instance page and open the Volumes tab. Then select the desired volume from the list and click Create snapshot.
Snapshot is created in two steps. At the first step, a snapshot of the volume state is created. This is a sub-second operation, which does not block volume reads/writes.
At the second step, the snapshot content is transferred to object storage. It can take a long time depending on the amount of data; meanwhile, the volume snapshot will be in the Creating state. The volume can be attached, detached, or deleted without waiting for this step to complete. You can only create another snapshot of the same volume after the snapshot has been fully transferred to the object storage and the snapshot state has changed to Completed. You can monitor the progress on the volume snapshot page.
Important
For all company projects and users, you can simultaneously create a maximum of 16 volume snapshots.
Important
To ensure volume snapshot consistency of a volume attached to a running instance, stop the instance or flush the cache and suspend writing to the volume.
Create a volume version#
To save the volume content at a certain point in time and then quickly restore it, you can create a volume version, which creates a volume snapshot. However, the snapshot content is not sent to another storage, so the version is created in a fraction of a second.
To create a volume version, go to the instance page, open the Volumes tab, select the desired volume and click Create version. In the dialog window, set the Name tag and add other tags if necessary. You can also create the disk version in the Volumes section or on the volume page. Read the volume version documentation to learn more about volume versions, in particular how to restore a volume from an existing version.
Important
As with volume snapshots, to ensure version consistency of a volume attached to a running instance, stop the instance or flush the cache and suspend writing to the volume.
Instance information#
For general information about created instances, see the Instances section. To view a summary table of all instances in the project, select All VPC in the VPC filter. To display instances from a particular VPC, select the desired VPC in the filter.
To view detailed information about a particular instance, go to the Instances section and select the desired instance from the list. To facilitate the instance search, select its relevant VPC in the VPC filter or use the table search.
Once you have selected the desired instance in the table, click the link with its ID. The instance page will open.
The Information tab contains instance details. You can perform all basic operations and actions with the instance and change its parameters, as well as work with the console.
The Volumes tab contains information about the volumes attached to the instance. You can attach/detach, export, take a snapshot, and create a version of a volume.
The Network and security tab contains details of the network interfaces attached to the instance and security groups assigned to the network interfaces of the instance. You can attach/detach a network interface, associate/disassociate an Elastic IP, and change security groups.
Metrics tab shows charts with instance metrics:
CPU utilization;
Network activity;
volumes utilization.
You can select the displayed statistics and set the period of time for which it is displayed. To automatically update the graph, enable Auto-refresh; to update it manually, click Refresh.
On the Alarms tab, you can view alarms, set for this instance. You can modify or delete these alarms.
The Tags tab contains information about the tags assigned to an instance. You can edit tag keys and values, as well as delete tags from the resource.